Archive

Posts Tagged ‘Transport’

Hercules Truck Anti Siphon – Great Price!

June 12th, 2024 Comments off

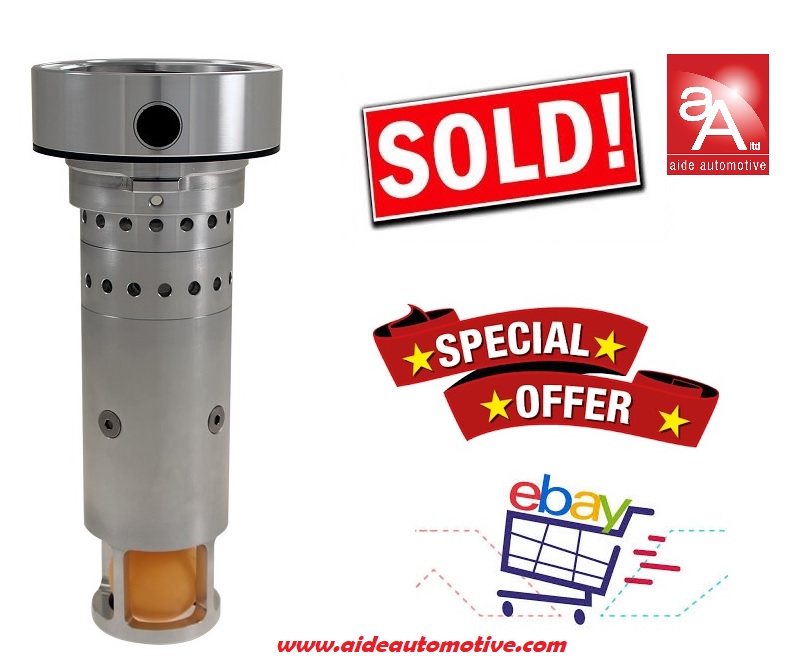
SOLD to Mr Motfolea Of #Peterborough The HGV / Truck Hercules Premium Floating Ball Device – 50% cost saving compared to other similar devices

aide automotive ltd on Google: https://buff.ly/3wYsNyA

HGV Diesel Tank Alarms & HGV Siphons, we have the right products to meet yr needs

aide automotive ltd on https://buff.ly/3VUSVAG

Please feel free to reach out to aide automotive at 0115 8456471 or send an email to info@aideautomotive.com for all of your automotive needs. We are proud to offer a comprehensive range of high-quality automotive products to cater to various requirements. Whether you are in the market for HGV Brake Testers, Trailer EBS Testers, or HGV Truck Trailer EBS/ABS Sensor Testers, we have you covered. Our Truck/Trailer Diagnostic Tools are designed to provide accurate and reliable diagnostics for efficient troubleshooting. Additionally, our Midtronics Battery Testers ensure that your batteries are in optimal condition for peak performance. To safeguard against fuel theft, our Anti Siphon Devices offer an effective solution. We also provide ISOCheck for monitoring ISO sockets, Trailer Locks for enhanced security, and Auto Braking Reversing Systems for improved safety. For HGV Diesel Tank Alarms and HGV Siphons, we have the right products to meet your needs. Finally, our Truck Susie Coil Covers protect your coils from damage, ensuring a longer lifespan. Contact us today to explore our wide range of automotive products and experience the quality and reliability that aide automotive is known for. Here – https://buff.ly/3kg1xoF But if in doubt or you have questions send a message and will be straight back to you !

HGV / Truck Hercules Premium Floating Ball Device - 50% cost saving compared to other similar devices

Our product range – Trailer / Caravan Light / Brake Tester – HGV Brake Testers – Trailer EBS Testers – HGV Truck Trailer EBS / ABS Sensor Tester – Truck /Trailer Diagnostic Tools – Midtronics Battery Testers – Anti Siphon Devices – ISOCheck – Trailer Locks – Auto Braking Reversing System – HGV Diesel Tank Alarms – HGV Siphon  – Misfuelling Diesel Head – Truck Susie Coil Covers – #MOT #Calibration – 12 Volt Trailer / Caravan Light / Brake Tester– Plus More

Plant Hire Buy TestaTow for 12 Volt Trailer Maintenance

March 22nd, 2024 Comments off

SOLD x 2 !! To HPS Plant Hire Ltd A plant hire company based in #Grimsby, HPS Plant Hire have invested in two Trailer Light Testers TestaTow TestaTow serves as a compact Trailer Wiring Tester specifically crafted for use with small Semi Trailers such as Ifor Williams models, horse boxes, Agricultural trailers, and Caravans. This convenient tool is powered by 12 Volts and is ideal for checking the functionality of the lights on your tow bar, trailer, and caravan. By utilizing TestaTow, you can verify that all lights are operational before embarking on your journey. It is a handy and trustworthy instrument for individuals who frequently utilize trailers or caravans. Learn more – https://buff.ly/3iGznmh

Trailer Light Testers TestaTow TestaTow serves as a compact Trailer Wiring Tester specifically crafted for use with small Semi Trailers such as Ifor Williams

Contact aide automotive on 0115 8456471 or info@aideautomotive.com Our product range – Trailer / Caravan Light / Brake Tester – HGV Brake Testers – Trailer EBS Testers – HGV Truck Trailer EBS / ABS Sensor Tester – Truck /Trailer Diagnostic Tools – Midtronics Battery Testers – Anti Siphon Devices – ISOCheck – Trailer Locks – Auto Braking Reversing System – HGV Diesel Tank Alarms – HGV Siphon  – Misfuelling Diesel Head – Truck Susie Coil Covers – #MOT #Calibration – 12 Volt Trailer / Caravan Light / Brake Tester– Plus More

Pall-Ex South West Review Pallet Truck Lock!

March 18th, 2024 Comments off

The Lee Lock pallet truck lock is specifically designed to secure the pallet truck in place at all times, preventing any potential accidents such as collisions with other pallets or damage to the curtain side. By securely locking the pallet truck into place, it also eliminates the risk of back injuries that may occur from manual lifting of the pallet truck. Now Pall-EX South West are the latest major operator to review the Lee Lock! For over 25 years Pall-Ex have supported businesses in the south west with complete, quality pallet distribution services as part of the Pall-Ex network. Pall-Ex pride themselves on delivering a personal, pro-active service for their customers. Learn more @ aide automotive https://buff.ly/3IZ4rIo

Please feel free to reach out to aide automotive for all of your automotive needs. We are proud to offer a comprehensive range of high-quality automotive products to cater to various requirements. Whether you are in the market for HGV Brake Testers, Trailer EBS Testers, or HGV Truck Trailer EBS/ABS Sensor Testers, we have you covered. Our Truck/Trailer Diagnostic Tools are designed to provide accurate and reliable diagnostics

Contact aide automotive on 0115 8456471 or info@aideautomotive.com Our product range – Trailer / Caravan Light / Brake Tester – HGV Brake Testers – Trailer EBS Testers – HGV Truck Trailer EBS / ABS Sensor Tester – Truck /Trailer Diagnostic Tools – Midtronics Battery Testers – Anti Siphon Devices – ISOCheck – Trailer Locks – Auto Braking Reversing System – HGV Diesel Tank Alarms – HGV Siphon  – Misfuelling Diesel Head – Truck Susie Coil Covers – #MOT #Calibration – 12 Volt Trailer / Caravan Light / Brake Tester– Plus More

Lee Lock pallet truck lock is specifically designed to secure the pallet truck in place at all times, preventing any potential accidents such as collisions with other pallets or damage

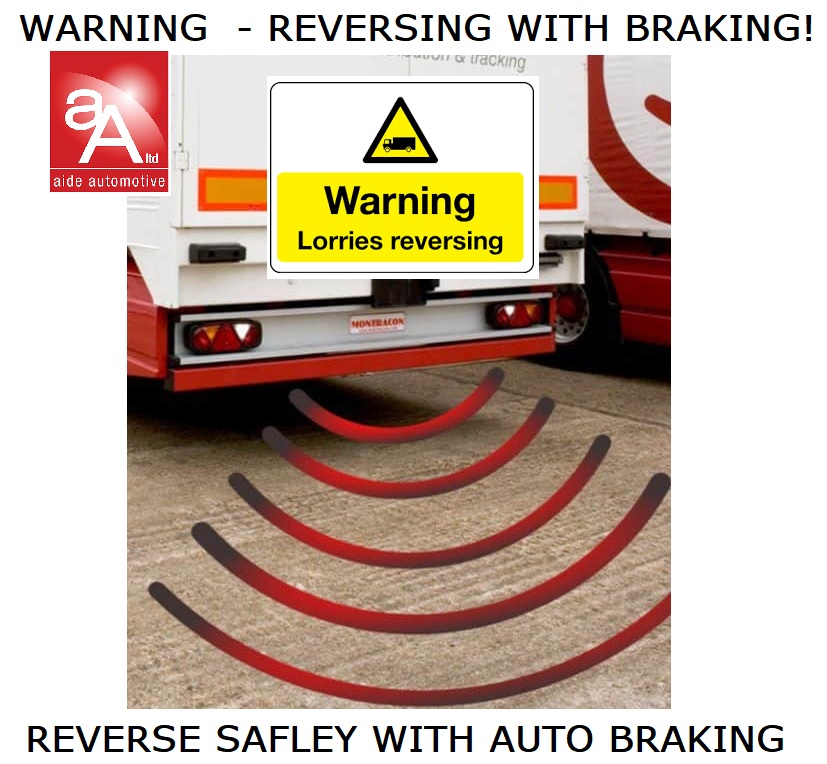
Safety Vehicle (HGV) Reversing With Braking

February 28th, 2024 Comments off

CV Stop will automatically apply the brakes if any of the sensors detect an obstacle, leaving sufficient time for a person to move or the vehicle being realigned. Obstacle Visual and Audible Indication to the driver Brakes apply for 3 seconds when an imminent collision is detected. Has override button for reversing into narrow streets and parking, to allow for vehicle overhang. Override default times out after 30 seconds for safety reasons (Programmable to customer spec) Brake application is pulsed, so no sharp jolts when stopping at speed. Commercial Vehicle Auto Braking Proximity Reversing Safety System https://buff.ly/3ito4xt via @aideautomotive

Contact aide automotive on 0115 8456471 or info@aideautomotive.com Our product range – Trailer / Caravan Light / Brake Tester – HGV Brake Testers – Trailer EBS Testers – HGV Truck Trailer EBS / ABS Sensor Tester – Truck /Trailer Diagnostic Tools – Midtronics Battery Testers – Anti Siphon Devices – ISOCheck – Trailer Locks – Auto Braking Reversing System – HGV Diesel Tank Alarms – HGV Siphon  – Misfuelling Diesel Head – Truck Susie Coil Covers – #MOT #Calibration – 12 Volt Trailer / Caravan Light / Brake Tester– Plus More

Safety Vehicle (HGV) Reversing With Braking

BrakeCheck Truck & Trailer User Guide / Manual

January 24th, 2024 Comments off

BrakeCheck TT Quick Reference Guide

Commercial Vehicle Brake Testing
The following criteria are required for all HGV & Trailer brake testing.
All brake testing should be carried out away from the sites working area; this should
be done in an area that has roughly level ground.
The MOT performance figures are for the Peak Reading:
Tractor Unit Service Brake Bare Minimum 50 %
Tractor Unit Secondary Brake Bare Minimum 25 %
Tractor Unit Parking Brake Bare Minimum 16 %
Although the test requirement looks for a peak reading, you could use the relationship
between the peak and average to determine brake performance, if you achieved a
peak reading of say 51 – 58 this is not indicating good brakes, peak figures of 70 +
can be achieved to indicate good brakes, even though high peaks are recorded if a
low average is recorded (20 – 30 example only) this would indicate poor brakes or you
will more than likely fail a roller brake test!

Brake Tester Position
The brake tester should be positioned in the foot well of the vehicle, preferably up
against a bulkhead with the direction of travel arrow pointing in the intended direction
and with the tester straight.

Vehicle Test Procedure
With the vehicle stationary, position and arm the brake tester, accelerate the vehicle
at a constant rate in a straight line up to a safe site speed then apply the brakes in an
emergency stop manner, hold the vehicle on the brake until the vehicle has come to a
complete rest.

Arming The Brake Tester For A Tractor Unit Test
BrakeCheck TT (4 Truck & Trailer) has a 99 test memory on the Service, Hand &
Trailer feature.
Turn the BrakeCheck on by pressing and holding MENU until Sbr is displayed on the
screen.
Press ENTER, the display will now show C1 (Wet Ground), this can be used to indicate
test ground condition, Press MENU to alter to C2 (Dry Ground) or C3 (Snow/Ice
Ground) & C4 (Tarmac Ground). Press ENTER and the level indicator L-| |- will now
show, if this is not the case re-position the BrakeCheck until achieved.
Press ENTER the display should now read 0.00 ± 5. As described above accelerate
and brake.
At the end of the test the display will show L#, this is the test number, press ENTER to
store the test, (remember to write down your vehicle ID and test number) if the display
still shows L-| |- you did not press ENTER!! The peak reading will report after you
pressed ENTER.

With the Peak reading displayed press ENTER, this will show the average reading.
Pressing ENTER again shows further information.
For a Hand Brake Test press MENU twice, this is while the service brake results are
displayed, the display should now show Hbr, now go to the second paragraph under
Arming The Brake Tester to carry out a Hand Brake Test.

Commercial Trailer Brake Testing
VOSA offered guidance on testing commercial trailers and advised, “The way to use a
decelerometer is to first test the drawing vehicle on its own. Then connect the trailer
and the deceleration rate should be similar i.e. the trailer is doing its fair share of work.
This is not an exact science but would be enough to give you confidence the trailer
brakes were working.”
Further individual brake performance testing can be done by using an Infra Red
Thermometer to measure brake disc or drum temperatures, this can be done after
brake testing or when vehicles are returning from a journey. An optional accessory to
the BrakeCheck TT kit is an Infra Red thermometer; please consider this as a very
useful way to review individual brake performance!
We suggest you test a tractor unit on the day you are required to test trailers, to test
trailers first test a tractor unit, this only needs to be carried out once, you can then add
multiple trailers to the tractor unit through the day, no need to test a tractor unit every
time you test a trailer. Trailer tests will be associated with the last tractor unit Service
Test!
We recommend clearing the memory of the BrakeCheck TT prior to testing trailers,
Turn on the BrakeCheck by Pressing and holding MENU for 3-4 seconds, the display
will show Sbr, press MENU until Clr is shown in the display, this will happen after
Temperature. Press ENTER, wait for 3 straight digits to move across the display and
reset to Sbr. This has now cleared all memory.
Test a tractor unit or shunter, you may warm the brakes up prior to testing if the vehicle
has been sat for a period. Test a tractor unit or shunter as per previous guidance
Arming The Brake Tester For A Tractor Unit Test. Once an acceptable test has been
recorded leave the test in the memory, remember the trailer brake test will be
associated wit the latest Sbr brake test in the memory! If one test was completed this
will be test 1.

Trailer Brake Testing
Press MENU to turn the BrakeCheck on, with Sbr on the display press MENU twice,
trb will be displayed. With the BrakeCheck positioned in the pulling vehicle, press
ENTER, the display will now show C1 (Wet Ground), this can be used to indicate test
ground condition, press MENU to alter to C2 (Dry Ground) or C3 (Snow/Ice Ground) &
C4 (Tarmac Ground). Press ENTER and the level indicator L-| |- will now show, if this
is not the case re-position the BrakeCheck until achieved.
Press ENTER the display should now read 0.00 ± 5. Accelerate and brake the
combination, when testing trailers we recommend a gradual acceleration and then a
controlled emergency stop. Once the test has been completed the display will show
L#, this is the test number, press ENTER to store the test, (remember to write down
your vehicle ID and test number) if the display still shows L-| |- you did not press
ENTER!! The peak reading will report after you pressed ENTER, as per the VOSA
guidance stated above this should be similar of the service brake test of the pulling
vehicle to confirm a trailer pass.

Printing Stored Tests
BrakeCheck has a 99 – TEST MEMORY on the Service , Hand and the Trailer
Brake Test
The BrakeCheck can output test results to a printer. BrakeCheck prints to a printer via
Infra Red.
To Print:-
Point the front of the BrakeCheck at the Printer about 10-30 cm’s apart.
To Print a Service Brake:
If the BrakeCheck has powered-down due to inactivity:

Press “MENU” until the display shows Sbr

Press “MENU” three times until the BrakeCheck display shows Sbr and the bottom half
of the BrakeCheck shows two lights, one on Service Brake Test and the other on Last
Test Result

Press “MENU” once, the display will show L n, press MENU the display will show L A
(pressing ENTER now will print off all tests in the memory), Press MENU and the
display will show L 1, pressing MENU will increase the test number by ONE, holding
down MENU will increase the test number at a rapid rate.

With the desired test number on the display press ENTER, the Peak Reading will be
displayed, with the printer switched on and the BrakeCheck pointed at the printer press
PRINT. Each print out will take roughly 10 seconds to print.
This is not necessary if the unit has not powered down, the Peak Deceleration
(Front/Rear) LED will be lit and the display will show a value, eg – .086

Make sure the printer is turned on by pressing the grey M button on the front of the printer; a green light should now be on (without flashing)
If a green light is flashing the printer needs recharging or has no paper!!
Point the front of the brake tester at the front of the printer.

Press “PRINT” once, the display will show: – Prt

and the printer will print the results for the last test performed.
Now do the same for the Hand Brake and Trailer Brake but have the Hand or Trailer
brake test light and LAST TEST RESULT illuminated on the BrakeCheck.
To turn the printer off, again press the long rectangle button on the front of the printer
BrakeCheck GEO User Guide

January 10th, 2024 Comments off

BrakeCheck GEO Quick Reference Guide

Commercial Vehicle Brake Testing

The following criteria are required for all HGV brake testing.

All brake testing should be carried out away from the sites working area; this should be done in an area that has roughly level ground.

The MOT performance figures are for the Peak Reading:

Service Brake Bare Minimum                         50 %

Secondary Brake Bare Minimum                    25 %

Parking Brake Bare Minimum                         16 %

Although the test requirement looks for a peak reading, you could use the relationship between the peak and average to determine brake performance, if you achieved a peak reading of say 51  – 58 this is not indicating good brakes, peak figures of 70 + can be achieved to indicate good brakes, even though high peaks are recorded if a low average is recorded (20 – 30 example only) this would indicate bad brakes or you will more than likely fail a roller brake test!

Brake Tester Position

The brake tester should be positioned in the foot well of the vehicle, preferably up against a bulkhead with the direction of travel arrow pointing in the intended direction and with the tester straight.

Vehicle Test Procedure

With the vehicle stationary, position and arm the brake tester, accelerate the vehicle at a constant rate in a straight line up to a safe site speed then apply the brakes in an emergency stop manner, hold the vehicle on the brake until the vehicle has come to a complete rest.

Arming The Brake Tester

Turn the BrakeCheck on by pressing and holding MENU until Sbr is displayed on the screen.

Press ENTER, the display may well show GPS flashing (Setup Mode also flashes), if so the BrakeCheck is now in GPS location mode, once the BrakeCheck has found the satellites then the test will move onto the level indicator.

The display will now show the level indicator L-| |-, if this is not the case re-position the BrakeCheck until achieved.

Press ENTER the display should now read 0.00 ± 5. As described above accelerate and brake.

The peak reading will report at the end of the test, if the display still shows L-| |- you did not press ENTER!!

With the Peak reading displayed press ENTER, this will show the average reading. Pressing ENTER again shows further information.

For a Hand Brake Test press MENU twice, this is while the service brake results are displayed, the display should now show Hbr. Now go to the second paragraph under Arming The Brake Tester to carry out a test.

Printing Stored Tests

BrakeCheck GEO has a 99-test memory on the service and hand brake tests; the tests are stored in the memory by the latest test completed being test number 1.

Printing is via Infra-red! No cable required.

Point the front of the BrakeCheck at the front of the printer.

To Print the Service Brake:

If the BrakeCheck has powered-down due to inactivity:

Press MENU until the display shows Sbr.

Press MENU twice until the BrakeCheck display shows Sbr and the bottom half of the shows to lights, one on Service Brake Test and the other on Last Test Result

Press ENTER once, the display will show L n, press MENU the display will show L A (pressing ENTER now will print off all tests in the memory), Press MENU and the display will show L 1, pressing MENU will increase the test number by ONE, holding down MENU will increase the test number at a rapid rate:

With the desired test number on the display press ENTER, the Peak Reading will be displayed, with the printer switched on and the BrakeCheck pointed at the printer press PRINT. Each print out will take roughly 10 seconds to print. This is not necessary if the unit has not powered-down, the Peak Deceleration (Front/Rear) LED will be lit and the display will show a value, eg: 0.86

Turn the printer on by pressing the grey M button on the front of the printer, a green light should now be on! If a green light is flashing the printer needs recharging or paper is low!!

Press PRINT once, the display will show: Prt

and the printer will print the results for the last test performed. Now do the same for the Hand Brake but have the Hand brake test light and Last Test Result illuminated on the BrakeCheck.

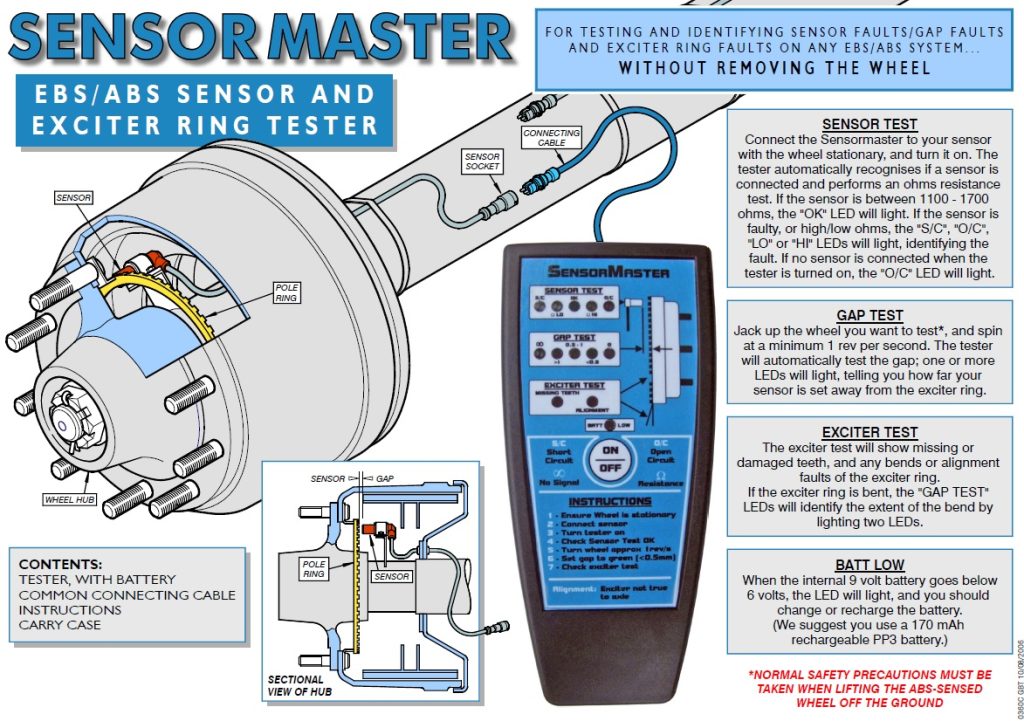
HGV Sensor Master User Guide EBS / ABS Tester

December 7th, 2023 Comments off

Buy @ the aide auto web shop today 24/7 –

Contact aide automotive on 0115 8456471 or info@aideautomotive.com Our product range – Trailer / Caravan Light / Brake Tester – HGV Brake Testers – Trailer EBS Testers – HGV Truck Trailer EBS / ABS Sensor Tester – Truck /Trailer Diagnostic Tools – Midtronics Battery Testers – Anti Siphon Devices – ISOCheck – Trailer Locks – Auto Braking Reversing System – HGV Diesel Tank Alarms – HGV Siphon  – Misfuelling Diesel Head – Truck Susie Coil Covers – #MOT #Calibration – 12 Volt Trailer / Caravan Light / Brake Tester– Plus More

EXP1000 HD Midtronics Battery Tester

November 23rd, 2023 Comments off

GREAT Price on a TOP END Tester – Reconditioned with warranty! Limited stock EXP1000FHD platform created specifically with Fleet workshop users in mind, incorporating many Features enabling recording & building of vehicle specific test analysis records through its ability in recording the vehicles individual Fleet or VIN number. The EXP1000FHD Fleet Specific testing platform incorporates specific features supporting PSV & CV workshop applications. With its unique ability in recording the user ID (enabling you to identify who is performing the test) along with Vehicle Identification input, enabling tracking of specific vehicle test reports on all vehicles tested and storing them onto the internal SD card for future reference and analysis.

Truck Battery Tester
EXP1000 HD HGV Battery Tester

Contact aide automotive on 0115 8456471 or info@aideautomotive.com Our product range – Trailer / Caravan Light / Brake Tester – HGV Brake Testers – Trailer EBS Testers – HGV Truck Trailer EBS / ABS Sensor Tester – Truck /Trailer Diagnostic Tools – Midtronics Battery Testers – Anti Siphon Devices – ISOCheck – Trailer Locks – Auto Braking Reversing System – HGV Diesel Tank Alarms – HGV Siphon  – Misfuelling Diesel Head – Truck Susie Coil Covers – #MOT #Calibration – 12 Volt Trailer / Caravan Light / Brake Tester– Plus More

Car Diagnostics = ThinkCar Euro Master

November 22nd, 2023 Comments off

Great value all around diagnostics from Thinkcar UK.

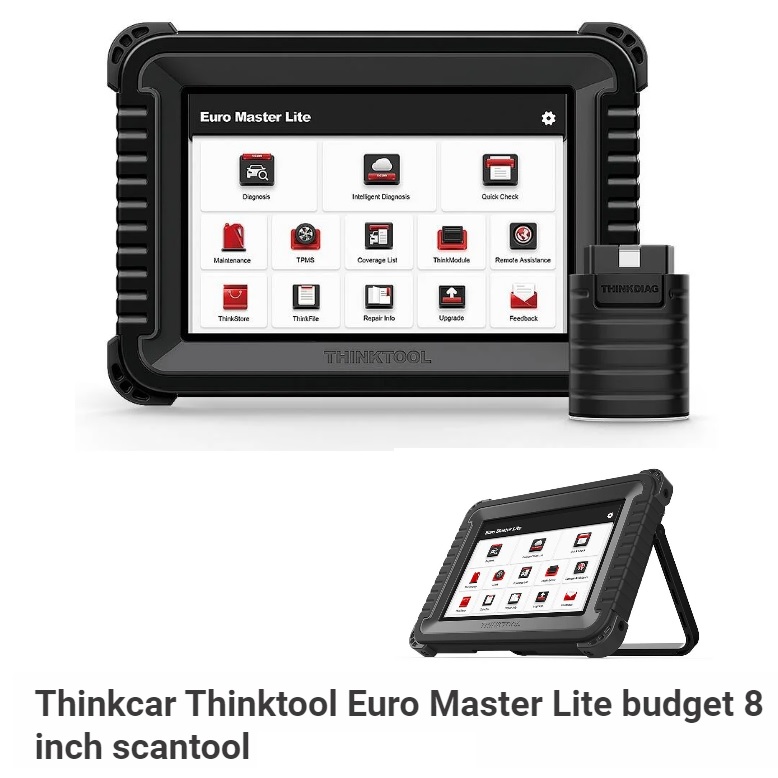
ThinkTool Euro Master Lite, 8” OE- Level Professional Diagnostic Tool Developed By ThinkCar.

The Euro Master lite is THINKCAR UKs new compact pro-level scan tool. This tool is designed to be streamlined and deployable. When technicians have jobs outside the shop or jobs need to be resolved fast, the Euro master lite is up to the task.

Equipped with VAG Guidance for VW, AUDI, SKODA and SEAT vehicles, the Thinkcar Master Lite can walk you through operations with step-by-step instructions, help you skip the security access code and channel numbers to perform matching, calibrations, and basic adjustments or settings, effectively streamlining the diagnostic process.

The Master lite allows professional technicians to take on more jobs with access to automotive coverage for over 200 vehicle makes, including GM, FORD, Chrysler, Benz, BMW and more.

With Bi-Directional capabilities, the Thinkcar Master Lite can perform individual tests for single actuators to know if the actuator functions well. Capabilities include fuel injectors, coolant pumps, windows, windshield wipers, and more.

The Thinkcar Master Lite allows the customers to dig deep into all systems including Engine, Transmission, Airbag, ABS, ESP, TPMS, Immobilizer, Gateway, Steering, Radio, Air Conditioning Systems, and more.

The Thinkcar Master Lite reads & clears fault codes with ease. Users can quickly detect the fault codes in all systems and clear them with one click.

Record data streams for reference at any time. The data will be displayed in the form of an easy-to-read graph which helps users intuitively observe data changes over time and view up to 12 data streams on one screen

The Thinkcar Master Lite offers FCA Gateway access to perform enhanced diagnostics, such as clearing DTCs, bi-directional control, Oil resets, SAS resets and more special functions on FCA vehicles (Chrysler, Dodge, Jeep and more).

Users can pair the Master Lite with the whole range for THINKCAR Accessories such as oscilloscope, battery tester, thermal camera, TPMS tool plus more.

Car Diagnostics Scanner

BrakeCheck Secondary With Printer

November 13th, 2023 Comments off

Quick Reference User Guide

Commercial Vehicle Brake Testing


The following criteria are required for all HGV brake testing.
All brake testing should be carried out away from the sites working area; this should
be done in an area that has roughly level ground.


The MOT performance figures are for the Peak Reading:
Service Brake Bare Minimum 50 %
Secondary Brake Bare Minimum 25 %
Parking Brake Bare Minimum 16 %


Although the test requirement looks for a peak reading, you could use the
relationship between the peak and average to determine brake performance, if you
achieved a peak reading of say 51 – 58 this is not indicating good brakes, peak
figures of 70 + can be achieved to indicate good brakes, even though high peaks are
recorded if a low average is recorded (20 – 30 example only) this would indicate bad
brakes or you will more than likely fail a roller brake test!


Brake Tester Position
The brake tester should be positioned in the foot well of the vehicle, preferably up
against a bulkhead with the direction of travel arrow pointing in the intended direction
and with the tester straight.


Vehicle Test Procedure
With the vehicle stationary, position and arm the brake tester, accelerate the vehicle
at a constant rate in a straight line up to a safe site speed then apply the brakes in an
emergency stop manner, hold the vehicle on the brake until the vehicle has come to
a complete rest.


Arming The Brake Tester
Turn the BrakeCheck on by pressing and holding MENU until Sbr is displayed on the
screen.
Press ENTER, the display will now show the level indicator L-| |-, if this is not the
case, re-position the BrakeCheck until achieved.
Press ENTER the display should now read 0.00 ± 5.

As described above accelerate and brake.
The peak reading will report at the end of the test, if the display still shows L-| |- you
did not press ENTER!!
With the Peak reading displayed press ENTER, this will show the average reading.
Pressing ENTER again shows further information.
For a Hand Brake Test press MENU twice, this is while the service brake results are
displayed; the display should now show Hbr. Now go to the second paragraph under
“Arming The Brake Tester” to carry out a test.


For a Secondary Brake Test press MENU three times, this is while the hand brake
results are displayed, and the display should now show SEc. Now go to the second
paragraph under “Arming The Brake Tester” to carry out a test.

Printing Stored Tests
BrakeCheck has a 1 – TEST MEMORY on the Service Brake, Secondary Brake
and Hand Brake Test
The BrakeCheck can output test results to a printer if required. Printing is via Infra
red.


To Print:
Printing the Service Brake:
If the BrakeCheck has powered-down due to inactivity:
Press – Menu until the display shows Sbr.


Press Menu twice until the BrakeCheck display shows Sbr and the bottom half of
the BrakeCheck Decal menu shows two lights, one on Service Brake Test and the other on Last Test Result
Press “Enter” once, (this is not necessary if the unit has not powered-down) the
Peak Deceleration (Front/Rear) LED will be lit and the display will show a value, eg: 00.71

Make sure the printer is turned on, turn the printer on by pressing the GREY M
button on the front of the printer, a green light should now be consistent on.


If the green light is flashing the printer needs recharging!!
Point the front of the brake tester at the front of the printer.
Press “Print” once, the display will show: Prt
and the printer will print the results for the last test performed.
Now do the same for the Hand Brake or the Secondary Brake, but have the Hand
brake test light and Last Test Result illuminated on the BrakeCheck or the Service,
Hand Brake & Last Test Result illuminated for the Secondary Brake