Archive

Posts Tagged ‘Aide Automotive’

FuelKeep Value Anti Siphon Device Special Price Offer For December 2011

December 6th, 2011 Comments off

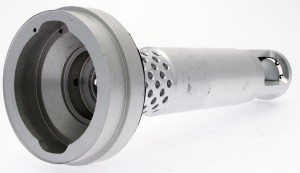
aide automotive ltd introduced FuelKeep Value to offer a highly effective but economical anti syphon device for the high volume large tank market.


FuelKeep Value is available for vehicles with 105 mm external diameter tank inlets, such as Volvo, Foden, DAF, Mercedes, MAN, Renault & Iveco. FuelKeep is quickly fitted to the tank with no drilling or gluing and has been tested to refill up to 120 litres per minute.


FuelKeep Value will also allow a locking cap to be replaced on top to help secure the highly expensive fuel even further.


With the introduction of the FuelKeep Value we are able to offer our customers an excellent low cost device with a special introduction price for December 2011 of just £25.00 each + vat while stocks last!

Anti Siphon Device for Trucks, Volvo, DAF, Mercedes, Renault

Stop Fuel Theft WIth a Low Cost Anti Siphon Device

BrakeCheck Recalibration Service

November 28th, 2011 Comments off

Dear Sir /Madam,

It has been 24 months since your BrakeCheck was calibrated.

With all tools in your workshop, you need to know they are working correctly and in test situations supplying the correct information. With this, we advise that your BrakeCheck is recalibrated.

We will aim to complete the recalibration of your BrakeCheck within 48 hours of receipt of the unit.

Option 1 – BrakeCheck Recalibration (ONLY)

All prices exclude VAT.

For BrakeCheck recalibration (ONLY), you will need to return the BrakeCheck only.  Please note chargers, cases, printers are not required.
It is suggested that you use a royal mail recorded delivery service / special delivery or courier to ensure that the unit(s) reach us safely.

Returns address: –
aide automotive Limited
Service Dept
Foxhall Business Centre
Foxhall Road
Nottingham, NG7 6LH

Option 2  – BrakeCheck recalibration with Service and test

For BrakeCheck recalibration, service and test, you will need to return your BrakeCheck, Printer, Chargers.
It is suggested that you use a royal mail special delivery service or courier to ensure that the unit(s) reach us safely

Returns address: –
aide automotive Limited
Service Dept
Foxhall Business Centre
Foxhall Road
Nottingham, NG7 6LH

Please be so kind as to provide a full postal address for your return and a purchase order number and invoice address?

If you have any questions, please feel free to call the office on 0115 845 6471.

Many thanks

Matthew Burke
aide automotive ltd
Tel 0115 8456471
Fax 07092 311470
Mobile 0787 6653609
www.aideautomotive.com
Address – Foxhall Business Centre – Foxhall Road – Nottingham – NG7 6LH
All orders are subject to aide automotive ltd business terms & conditions, copies supplied upon request.

PSV Anti Siphon Device

November 21st, 2011 Comments off

The TP Anti Syph PSV Prices are Now Even Lower!
aide automotive are pleased to REDUCE prices of the TP Anti Syph PSV!


In these tough economical times we believe the decsion to reduce prices of an anti syphon product can only help bus and coach operators protect against fuel theft and keep businesses on the road.


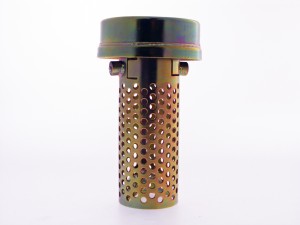
The TP Anti Syph PSV fits into the neck of a bus or coach with a clip over cap. Easily fitted, this Anti Siphon virtually protects in total against fuel theft.


Our new pricing reflects to a 20% decrease in the RRP of the TP Anti Syph PSV with the option of further discounts for quantity purchases.


For a up to date quote for the PSV Anti Syphon click on aide automotive

Anti Siphon Device For Buses Or PSV

Anti Siphon Device to Stop Fuel Theft From Buses, Coaches Or PSV

TowBar Tester Pro Details & Picture

November 14th, 2011 Comments off

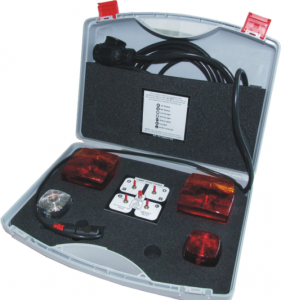
With the new requirement of testing 13 Pin tow bar electrics from January 2012, aide automotive have introduced a tester for the “professionals ” The Tow Bar Tester Pro.
Testing 13 pin tow bar electrics will be a growing requirement of the MOT over the next 3 years, with many new cars having  tow bars with 13 pin rather than the 7 pin sockets used in the past. Also, when caravans moved to 13 pin sockets in 2009, many cars had 13 pin sockets installed therefore a number of cars will need testing within 2012 and many more in 2013 / 2014.

As the TowBar Tester Pro is the ultimate towing electrical tester it can also be used to test the positive 12 volt ignition switched live and positive 15 volt ignition live. To complete all tow bar electrical tests the Tow Bar Tester Pro will also test the reverse lamp. As this is the most comprehensive tester on the market, every tow bar test undertaken will leave you satisfied all aspects of the tow bar electrics are working and your customer can tow with confidence.
So with the RIGHT tester there is no chance of wasting time consulting VOSA on erratic test readings, no chance of incorrect failures and also has usages beyond the MOT test.

Contact aide automotive by clicking on 13 Pin Tow Bar Tester.


MOT Approved Tow Bar Tester

13 Pin MOT Apporved Tow Bar Tester

EBS/ABS Sensor Tester

November 4th, 2011 Comments off

Europart of Denmark have now been appointed distributors for Denamrk of the EBS/ABS Sensor Tester.

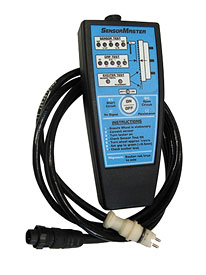
Using the Sensor Tester to check a sensor, the gap and exciter ring Royal Mail found they were able to easily and cost effectively repair warning lights faults on trucks and trailers without the need for expensive diagnostics tools or dealer trips.

All workshops requires fast, accurate and effective tools to diagnose faults easily and quickly. A high percentage of brake EBS/ABS faults are around the sensor or the sensor itself.

Europart have ordered over 100 testers since September with an excellet response from customers.

To review the ABS Tester, click on Sensor Tester ABS.

aide automotive sell and marekt the EBS/ABS Sensor Tester in the UK.

Truck Trailer ABS Sensor Tester

Sensor Tester for ABS or EBS

Skimming prevention Anti Syphon Device

October 26th, 2011 Comments off

Hercules is a Skimming prevention anti syphon device from aide automotive ltd.

The Hercules Fuel Security and Safety Device is the only device to prevent ANY fuel loss due to its unique float-valve that allows fuel to flow into the tank, but locks off once filling is stopped, meaning no fuel can be siphoned.

Also the Hercules can reduce fuel spillage, stopping spiilages is good for the environment and safety on the road.

With fuel theft on the increase this product prevents thieves from siphoning and skimming fuel from the tank. Another benefit is that it prevents fuel spillages. All in all it saves an organisation money in terms of the cost of potential stolen fuel, replacement fuel and fuel spillages.

Contact aide automotive by clicking on Hercules Anti Syphon Device.


Stop Fuel Theft With Anti Skimmimng Syphon Device

Floating Ball Anti Syphon Device From aide automtoive

Truck & Trailer Brake Tester

October 17th, 2011 Comments off

aide automotive have posted the user guide for the BrakeCheck TT (Truck & Trailer).

Commercial Vehicle Brake Testing

The following criteria are required for all HGV & Trailer brake testing.

All brake testing should be carried out away from the sites working area; this should be done in an area that has roughly level ground.

The MOT performance figures are for the Peak Reading:

Tractor Unit Service Brake Bare Minimum    50 %
Tractor Unit Secondary Brake Bare Minimum  25 %
Tractor Unit Parking Brake Bare Minimum   16 %

Although the test requirement looks for a peak reading, you could use the relationship between the peak and average to determine brake performance, if you achieved a peak reading of say 51  – 58 this is not indicating good brakes, peak figures of 70 + can be achieved to indicate good brakes, even though high peaks are recorded if a low average is recorded (20 – 30 example only) this would indicate bad brakes or you will more than likely fail a roller brake test!

Brake Tester Position

The brake tester should be positioned in the foot well of the vehicle, preferably up against a bulkhead with the direction of travel arrow pointing in the intended direction and with the tester straight.

Vehicle Test Procedure

With the vehicle stationary, position and arm the brake tester, accelerate the vehicle at a constant rate in a straight line up to a safe site speed then apply the brakes in an emergency stop manner, hold the vehicle on the brake until the vehicle has come to a complete rest.

Arming The Brake Tester For A Tractor Unit Test

BrakeCheck TT (4 Truck & Trailer) has a 99 test memory on the Service, Hand & Trailer feature.

Turn the BrakeCheck on by pressing and holding MENU until Sbr is displayed on the screen.

Press ENTER, the display will now show C1 (Wet Ground), this can be used to indicate test ground condition, Press MENU to alter to C2 (Dry Ground) or C3 (Snow/Ice Ground) & C4 (Tarmac Ground). Press ENTER and the level indicator L-| |- will now show, if this is not the case re-position the BrakeCheck until achieved.
Press ENTER the display should now read 0.00 ± 5. As described above accelerate and brake.

At the end of the test the display will show L#, this is the test number, press ENTER to store the test, (remember to write down your vehicle ID and test number) if the display still shows L-| |- you did not press ENTER!! The peak reading will report after you pressed ENTER,


With the Peak reading displayed press ENTER, this will show the average reading. Pressing ENTER again shows further information.

For a Hand Brake Test press MENU twice, this is while the service brake results are displayed, the display should now show Hbr, now go to the second paragraph under Arming The Brake Tester to carry out a Hand Brake Test.

Commercial Trailer Brake Testing

VOSA offered guidance on testing commercial trailers and advised, “The way to use a decelerometer is to first test the drawing vehicle on its own. Then connect the trailer and the deceleration rate should be similar i.e. the trailer is doing its fair share of work. This is not an exact science but would be enough to give you confidence the trailer brakes were working.”

Further individual brake performance testing can be done by using an Infra Red Thermometer to measure brake disc or drum temperatures, this can be done after brake testing or when vehicles are returning from a journey. An optional accessory to the BrakeCheck TT kit is an Infra Red thermometer; please consider this as a very useful way to review individual brake performance!

We suggest you test a tractor unit on the day you are required to test trailers, to test trailers first test a tractor unit, this only needs to be carried out once, you can then add multiple trailers to the tractor unit through the day, no need to test a tractor unit every time you test a trailer. Trailer tests will be associated with the last tractor unit Service Test!

We recommend clearing the memory of the BrakeCheck TT prior to testing trailers, Turn on the BrakeCheck by Pressing and holding MENU for 3-4 seconds, the display will show Sbr, press MENU until Clr is shown in the display, this will happen after Temperature. Press ENTER, wait for 3 straight digits to move across the display and reset to Sbr. This has now cleared all memory.

Test a tractor unit or shunter, you may warm the brakes up prior to testing if the vehicle has been sat for a period. Test a tractor unit or shunter as per previous guidance Arming The Brake Tester For A Tractor Unit Test. Once an acceptable test has been recorded leave the test in the memory, remember the trailer brake test will be associated wit the latest Sbr brake test in the memory! If one test was completed this will be test 1.

Trailer Brake Testing

Press MENU to turn the BrakeCheck on, with Sbr on the display press MENU twice, trb will be displayed. With the BrakeCheck positioned in the pulling vehicle, press ENTER, the display will now show C1 (Wet Ground), this can be used to indicate test ground condition, press MENU to alter to C2 (Dry Ground) or C3 (Snow/Ice Ground) & C4 (Tarmac Ground). Press ENTER and the level indicator L-| |- will now show, if this is not the case re-position the BrakeCheck until achieved.

Press ENTER the display should now read 0.00 ± 5. Accelerate and brake the combination, when testing trailers we recommend a gradual acceleration and then a controlled emergency stop. Once the test has been completed the display will show L#, this is the test number, press ENTER to store the test, (remember to write down your vehicle ID and test number) if the display still shows L-| |- you did not press ENTER!! The peak reading will report after you pressed ENTER, as per the VOSA guidance stated above this should be similar of the service brake test of the pulling vehicle to confirm a trailer pass.


To Print:-

Point the front of the BrakeCheck at the Printer about 10-30 cm’s apart.

To Print a Service Brake:

If the BrakeCheck has powered-down due to inactivity:

Press     until the display shows Sbr.
Press    three times until the BrakeCheck display shows Sbr and the bottom half of the BrakeCheck shows two lights, one on Service Brake Test and the other on Last Test Result

Press   once, the display will show L n, press MENU the display will show L A (pressing ENTER now will print off all tests in the memory), Press MENU and the display will show L 1, pressing MENU will increase the test number by ONE, holding down MENU will increase the test number at a rapid rate.
With the desired test number on the display press ENTER, the Peak Reading will be displayed, with the printer switched on and the BrakeCheck pointed at the printer press PRINT. Each print out will take roughly 10 seconds to print.

This is not necessary if the unit has not powered-down, the Peak Deceleration (Front/Rear) LED will be lit and the display will show a value, eg:


Make sure the printer is turned on by pressing the button on the front of the printer; a green light should now be on.
If a green light is flashing the printer needs recharging!!
If you have an orange flash your paper is getting low!!

Press      once, the display will show:

and the printer will print the results for the last test performed.

Now do the same for the Hand Brake and Trailer Brake but have the Hand or Trailer brake test light and LAST TEST RESULT illuminated on the BrakeCheck.
Brake Tester for Northern Ireland

September 27th, 2011 Comments off

DOE Accpet Use of BrakeCheck For Irish Truck Operators & Repairers
After many years of use in England, Scotland and Wales we are pleased to advise the BrakeCheck decelerometer for use on commercial vehicles in Northern Ireland.


BrakeCheck has been proven to be an excellent inspection sheet brake tester for all commercial vehicles with over 11000 testers sold since 2002. With many commercial operators and repairers using the BrakeCheck to conduct a VOSA accepted brake test on every inspection, BrakeCheck is the number 1 decelerometer on the market today!

Richard Lee Compliant and Enforcement Manager of the DOE in Northern Ireland has recently accepted the use of a decelerometer for heavy goods inspection sheet brake testing. Richard states “I can confirm that a decelerometer may be adequate for checking brake efficiency on some vehicles especially if it is linked to a printer and a record of the brake test can be recorded. This would be consistent with our Guide to Maintaining Roadworthiness which has a section (5) detailing safety inspection and repair facilities.”

The DOE are now advising commercial vehicle operators, commercial repairers and in house workshops to complete regular inspection sheet brake test, The BrakeCheck is the tester! BrakeCheck will conduct a Service, Secondary & parking brake test with ease and store in its memory for later printing via PC or portable printer.


To purchase a decelerometer or brake tester for inspection sheet brake testing click on  aide automotive ltd

Tow Bar Electrical Tester

September 17th, 2011 Comments off

13 Pin Tow Bar Tester For MOT
2012 MOT Requirement for Testing 13 Pin Tow Bars
With the new requirement of testing 13 Pin tow bar electrics from January 20012, aide automotive have introduced a tester for the “professionals “ The Tow Bar Tester Pro.
Testing 13 pin tow bar electrics will be a growing requirement of the MOT over the next 3 years with many new cars having a tow bars with 13 pin rather than the 7 pin socket used in the past. Also when caravans moved to 13 pin sockets in 2009 many cars had 13 pin sockets installed so a number of cars will need testing within 2012 and many more in 2003 and 4.
MOT Garages will need a VOSA approved tester to carry out this test and we believe The Tow Bar Tester Pro is the ultimate tester for testing all old and modern day tow bar systems, The Tow Bar Tester Pro has been designed and produced by industry tow bar electric system leaders Right Connections Ltd to be the best all round tester available.
The Tow Bar Tester Pro is built in a rugged case with actual bulbs to replicate all lights and to test as if a trailer was connected, with this there is no risk of confusion of failure or incorrectly failing a vehicle. Some low cost testers that use LED’s have shown inconsistent results when testing tow bars and indicating faults when there is not! Also found with low cost tester was that if the power line is not present on the tow bar socket then the tester will not work at all!!
Tow Bar Tester Pro incorporates a self test facility as required by VOSA specification, powered from the vehicle with a 13 pin cable long enough to connect to the tow bar socket, the operator will activate all tests via toggle switches on the main control board from the drivers seat.
In addition to the MOT requirement test The Tow Bar Tester Pro will also test the flasher warning system on the towing vehicle, although this is not part of the MOT test as yet, but if it ever becomes so Tow Bar Tester Pro incorporates this test. As the MOT garages have seen over the years, new requirements often have special notice amendments to update the test with unforeseen requirements from the first test specification; we believe this could be the case in the future as under European law there is a legal requirement for flashers on the trailer to be monitored by the towing vehicle for failure.
As the Tow Bar Tester Pro is the ultimate towing electrical tester it can also be used to test the positive 12 volt live and positive 15 volt ignition live, to complete all tow bar electrical tests the Tow Bar Tester Pro will also test the reverse lamp. As this is the most comprehensive tester on the market every  tow bar test undertaken will leave you satisfied all aspects of the tow bar electrics are working and your customer can tow with confidence.
So with the RIGHT tester there is no chance of wasting time consulting VOSA on erratic test readings, no chance of incorrect failures and usages beyond the MOT test.


Contact aide automotive to purchase a Tow Bar Tester Pro.

Brake Tester Decelerometer User Guide

September 12th, 2011 Comments off

Commercial Vehicle Brake Testing

The following criteria are required for all HGV brake testing.

All brake testing should be carried out away from the sites working area; this should be done in an area that has roughly level ground.

The MOT performance figures are for the Peak Reading:

Service Brake Bare Minimum                        50%

Secondary Brake Bare Minimum                   25%

Parking Brake Bare Minimum                        16%

Although the test requirement looks for a peak reading, you could use the relationship between the peak and average to determine brake performance, if you achieved a peak reading of say 51  – 58 this is not indicating good brakes, peak figures of 70 + can be achieved to indicate good brakes, even though high peaks are recorded if a low average is recorded (20 – 30 example only) this would indicate bad brakes or you will more than likely fail a roller brake test!

Brake Tester Position

The brake tester should be positioned in the foot well of the vehicle, preferably up against a bulkhead with the direction of travel arrow pointing in the intended direction and with the tester straight.

Vehicle Test Procedure

With the vehicle stationary, position and arm the brake tester, accelerate the vehicle at a constant rate in a straight line up to a safe site speed then apply the brakes in an emergency stop manner, hold the vehicle on the brake until the vehicle has come to a complete rest.

Arming The Brake Tester

Turn the BrakeCheck on by pressing and holding MENU until Sbr is displayed on the screen. Press ENTER, the display will now show the level indicator L-| |-, if this is not the case re-position the BrakeCheck until achieved. Press ENTER the display should now read 0.00 ± 5. As described above accelerate and brake. The peak reading will report at the end of the test, if the display still shows L-| |- you did not press ENTER!!

With the Peak reading displayed press ENTER, this will show the average reading. Pressing ENTER again shows further information.

For a Hand Brake Test press MENU twice, this is while the service brake results are displayed; the display should now show Hbr. Now go to the second paragraph under “Arming The Brake Tester” to carry out a test.

For a Secondary Brake Test press MENU three times, this is while the hand brake results are displayed, and the display should now show SEc. Now go to the second paragraph under “Arming The Decelerometer” to carry out a test.

Printing Stored Tests

BrakeCheck has a 1 – TEST MEMORY on the Service Brake, Secondary Brake and the Hand Brake Test

The BrakeCheck can output test results to a printer if required. A cable is provided with the serial printer.

To Print using the Cable Connect the supplied cable of the printer with the BrakeCheck cable

To Print the Service Brake:

If the BrakeCheck has powered-down due to inactivity:

Press   until the display shows Sbr. Press  twice until the BrakeCheck display shows Sbr and the bottom half of the shows to
lights, one on Service Brake Test and the other on Last Test Result Press  once, (this is not necessary if the unit has
not powered-down) the Peak Deceleration (Front/Rear) LED will be lit and the display will show a value, eg:

Make sure all cables are connected and turn the printer on by pressing the button on the front of the printer, a green light should now flash.

If a red light is flashing the printer needs recharging!! If you have an orange flash your paper is getting low!!

Press   once, the display will show: and the printer will print the results for the last test performed.

Now do the same for the Hand Brake or the Secondary Brake, but have the Hand brake test light and Last Test Result illuminated on the
BrakeCheck or the Service, Hand Brake & Last Test Result illuminated for the Secondary Brake .

To Purchase a Brake Tester, Decelerometer BrakeCheck click on aide automotive ltd